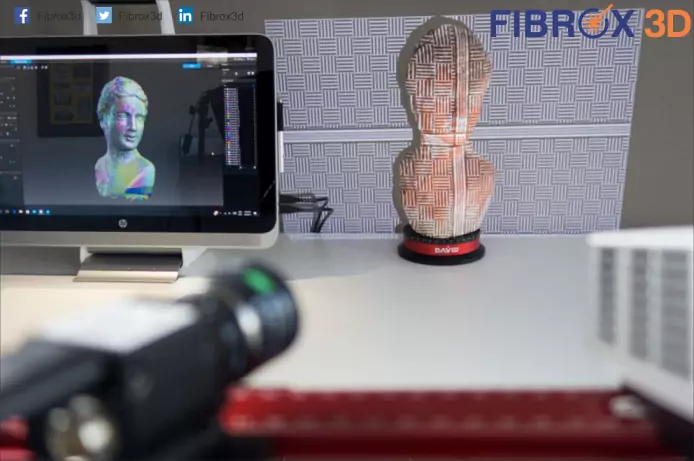
The white light 3D scanners provide precision scans with detailed resolution at high speeds. As White light3D scanners are a type of coordinate measuring machine CMM that utilizes optical non-contact technology to capture millions of accurate points in a single fast scan.
There are different names for this technology, such as an optical measuring machine, optical 3D scanner, white light 3D scanner, blue light 3D scanner, non-contact 3D scanner, etc. 3D Scanner is engineered with advanced hardware and intelligent software for repeatable accurate measurements with flexibility and process reliability.
The generation of industrial 3D scanners is the most innovative optical measuring system for 3D coordinate measurements on the market. It is widely utilized in various industries and can measure different object sizes, surface finishes, and shape complexities.
In simplest terms, based on the principles of triangulation, the projector projects a fringe pattern across the part’s surface and as the patterns rapidly change during each scan, cameras capture the displacement to calculate the 3D coordinate measurements.
This technology is minimal and each measurement can take less than 1 second. It does not require specialized programming skills or highly accurate fixtures. New generation 3D white light scanners discover discreet problematic areas that would have been undetected by traditional measurement methods by quickly scanning the entire object (part, mold, tool, die, etc.) in an accurate and dense point cloud.
In comparison to a traditional coordinate measuring machine (CMM), which takes a single measurement at each programmed point where the probe contacts the surface of the part, or an industrial 3D laser scanner that gathers measurement in strips or lines of data, These 3D white light scanners are optical non-contact measuring system that captures full-field scans of a volumetric area collecting millions of points per scan.
This digital 3D blueprint of the object’s geometry is then compared to CAD with a 3D inspection color map displaying a spectrum of colors that signify areas in and/or out of tolerance.
The 3D color map takes the uncertainty away so the optimal corrective action can be applied eliminating iterations and saving an enormous amount of costs and time that were once being spent on rework.
- Highly accurate traceable 3D measurements
- Detailed high-resolution scans
- Quick data collection
- Advanced parametric inspection functionality
- Complete metrology solution for dimensional analysis (GD&T, trend analysis, industry-specific inspection functionality, and much more…)
- Comprehensive reporting

