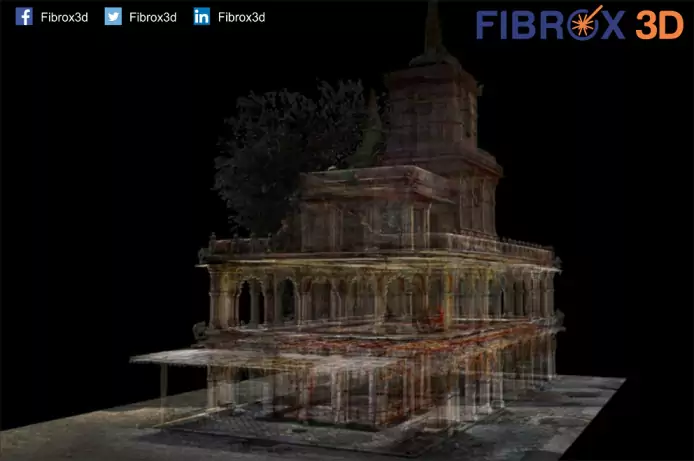
Types of 3D Scanning Technologies and 3D Scanners
3D laser scanning is a way to capture a physical object’s exact size and shape into the computer world as a digital 3-dimensional representation. This technique captures information like the complex geometry, intrigue shape, colorized texture, and other details of the 3D object that is scanned.
A 3D scanner collects information about the object being scanned as well as the environment (e.g. room) in which the object is present. If, a person is sitting beside the object that can also be 3D scanned. 3D scanners essentially create a digital copy of a real-world object. This digital copy of the 3D file can then be edited and 3D printed as per the user’s requirements. Also, a 3D file can be used for the further 3D modeling process. Generally, in this 21st-century Engineers are using this technology for reverse engineering processes. 3D scanner files are generally compatible with CAD software and 3D printing slicer software.
A single scan is not enough to re-create a complete model of the object being scanned. Normally, hundreds of scans are necessary to capture all of the information from various sides and angles. All of these scans than have to be integrated through a common reference system known as alignment/registration. Finally, the individual scans are merged to re-create the final model. This entire process of bringing together the individual scans and merging them is known as a 3D scanning pipeline.
3D laser scanning technology largely classified into the following methods: Time of Flight, Triangulation, Phase shift, Stereo.
Different types of 3d scanning methods and the principles they are based on, are as follows:
1. LASER triangulation 3D scanning technology.
2. Structured light 3D scanning technology.
3. Photogrammetry.
4. Contact-based 3D scanning technology.
5. LASER pulse-based 3D scanning technology.
1. Laser-based 3D Scanners
Laser-based 3D scanners use a process called trigonometric triangulation to accurately capture a 3D shape as millions of points. Laser scanners work by projecting a laser line or multiple lines onto an object and then capturing its reflection with a single sensor or multiple sensors.
The sensors are located at a known distance from the laser's source. Accurate point measurements can then be made by calculating the reflection angle of the laser light. Laser scanners are very popular and come in many designs.
They include handheld portable units, arm based, CMM based, long-range, and single point long-range trackers.
Benefits of 3D Laser Scanners
- Scan tough surfaces, such as shiny or dark finishes
- Lesser sensitive: to changing light conditions and ambient light
- Portable
- Simple design, easy to use and low cost.
2. Projected or Structured Light 3D Scanners
Historically known as “white light” 3D scanners, mainly structured light 3D scanners today use a blue or white LED projected light.
These 3D scanners project a light pattern consisting of bars, blocks, or other shapes onto an object.
The 3D scanner has one or more sensors that look at the edge of those patterns or structural shapes to determine the object's 3D shape.
Using the same trigonometric triangulation method as laser scanners the distance from the sensors to the light source is known. Structured
light scanners can be tripod mounted or handheld.
Benefits of Structured light 3D Scanners
- Very fast scan times –as fast as 2 seconds per scan
- Large scanning area –as large as 48 inches in a single scan
- High resolution –as high as 16 million points per scan and 16-micron (.00062”) point spacing
- Very high accuracy –as high as 10 microns (.00039”)
- Versatile –multiple lenses to scan small to large parts in a single system
- Portable –handheld systems are very portable
- Eye safe for 3D scanning of humans and animals
- Various price points from low cost to expensive depending on resolution and accuracy
3. Medium and Long-Range 3D Scanners
Long-range 3D scanners come in two major formats-Pulse based and phase shift–both of which are well suited for large objects such as buildings, structures, aircraft, and military vehicles. Phase shift 3D scanners also work well for medium-range scan needs such as automobiles, large pumps, and industrial equipment. These scanners capture millions of points by rotating 360 degrees while spinning a mirror the redirects the laser outward towards the object or areas to be 3D scanned.
Laser pulse-based 3Dscanners
Laser pulse-based scanners, also known as time-of-flight scanners, are based on a very simple concept: the speed of light is known very precisely. Thus, if the length of time laser takes to reach an object and reflect back to a sensor is known, the distance from the sensor to the object is known. These systems use circuitry that is accurate to picoseconds to measure the time it takes for millions of pulses of the laser to return to the sensor and calculates a distance. By rotating the laser and sensor (usually via a mirror), the scanner can scan up to a full 360 degrees around itself.
Laser Phase-shift 3D Scanners
Laser phase-shift systems are another type of time-of-flight 3D scanner technology and conceptually work similarly to pulse-based systems. In addition to pulsing the laser, these systems also modulate the power of the laser beam, and the scanner compares the phase of the laser sent out and returned to the sensor. Phase shift measurements are typically more accurate and quieter but are not as flexible for long-range scanning as pulse-based 3D scanners. Laser pulse-based 3D scanners can scan objects up to 1000m away while phase shift scanners are better suited for scanning objects up to 300m or less.
Benefits Long Range 3D Scanners
- 3D Scan millions of points in a single scan –up to 1 million points per second
- Large scanning area more than 1000 Sq. meters
- Good accuracy and resolution based on object size
- Non-contact to safely scan all types of objects
- Portable
4. Photogrammetry
This technology is quite simple. It involves stitching together photographs of an object taken from different angles. The photos are taken using a camera or even your smartphone with specific camera settings, while the stitching of those photos is done by special software. The software identifies pixels that correspond to the same physical point and brings pictures together accordingly.
Parameters like the focal length of the lens and its distortion need to be fed into the software by the user in order to create an accurate model. Photogrammetry is so simple that you can pick up your phone right now and start taking pictures.
The big advantage of using photogrammetry is its accuracy level and the speed with which the data of an object is acquired. The downside with this technique is the time it takes to run the image data through the software and the sensitivity of the end result in the resolution of the photographs. You need to have a good camera with high resolution and DPI to get a good end result.
We can simulate these photos with many software such as Reality capture, Blender, Meshroom, 3DF Zephyr, Agisoft Metashape, etc.
5. Contact scanning
This scanning method involves physical contact of a probe onto the surface of the object being scanned. First, the object is firmly held in place so that it does not move. Then, the touching probe is moved all over the object in order to collect the details of the object and all the 3D information that is necessary to create a digital file.
Enough points on the surface need to be sampled to create an accurate model. Sometimes, an articulated arm is used to control the touching probe and capture multiple angles/configurations with a high level of precision.
Since contact scanning involves actual physical contact with the surface of the object being scanned, even transparent and reflective surfaces can be accurately scanned using this method. This is the major benefit of this technique over other scanning technologies, which as pointed out above, are incapable of scanning such surfaces.
The disadvantage with contact 3D scanning is its slow speed. Running the touching probe through all sections of an object in order to collect all the 3D information takes time.
Contact 3D scanning is interestingly used to perform quality control in industrial fabrication. Parts that have been newly fabricated can be checked for any deformations or damages using contact scanning.
Basically, we can also define types of scanning technology in an optical and non-optical way,
Non-Optical Scanning
CT scan- Computed tomography (Expensive and difficult to use),
DICOM Protocol - Digital imaging and communications in Medicine
Density variation - software simulates one density level to second-density level -Shape of a skull(As an example)
Scanning through x-ray, Magnetic resonance(MRI), Ultrasound, Computed tomography(CT)
Optical Scanning
Visible spectrum, nonvisible spectrum
Laser - not visible
Basic steps for 3D Scanning process,
3D SCANNING》 DISTANCE 》 OPTICAL 》 ACTIVE
Currently, there is a new trend is there for scanning the object with a number of processes of scanning,
- Multiview stereo,
- Dense stereo match,
- 3D from photos,
- Dense Photogrammetry
On the other hand, 3D laser pulse-based scanning mainly used Laser diode and it is cheaper in price, last forever-as life cycle is more, also illuminate immediately and at a perfect level.
Laser is the most convenient light usable. The laser wavelength is not the reason to use in 3D scanning. This principle is based on the Time of Flight.
Triangulation: A light is projected on the surface and its reflection is read back by a sensor. Using trigonometric calculations to recover the 3D position of illuminated points.
Know more:
- 3D Scanning of Prefabricated components

